强网杯popmaster这题一直耿耿于怀,用正则毕竟不是作者的本意。刚好在看静态分析这块,纯理论实在太难顶,就再重新揣摩揣摩。
php-parser是一项用PHP编写的PHP解释器,可以把php代码转化为AST,以利于我们静态分析,在回到这道题之前,先简单了解一下php-parser的用法。
一个简单的例子:
<?php
use PhpParser\Error;
use PhpParser\NodeTraverser;
use PhpParser\ParserFactory;
require 'vendor/autoload.php';
$code = <<<'CODE'
<?php
$a="theoyu";
echo($a);
CODE;
//创建解释器实例
$parser = (new ParserFactory)->create(ParserFactory::PREFER_PHP7);
try {
    $ast = $parser->parse($code);
  	var_dump($ast);
} catch (Error $error) {
    echo "Parse error: {$error->getMessage()}\n";
    return;
}
首先需要创建一个解释器实例,同时需要指明php版本,对源码进行解析,同时通过PhpParser\Error对代码的异常进行捕获。
array(2) {
  [0]=>
  object(PhpParser\Node\Stmt\Expression)#1178 (2) {
    ["expr"]=>
    object(PhpParser\Node\Expr\Assign)#1177 (3) {
      ["var"]=>
      object(PhpParser\Node\Expr\Variable)#1175 (2) {
        ["name"]=>
        string(1) "a"
        ["attributes":protected]=>
        array(2) {
          ["startLine"]=>
          int(2)
          ["endLine"]=>
          int(2)
        }
      }
      ["expr"]=>
      object(PhpParser\Node\Scalar\String_)#1176 (2) {
        ["value"]=>
        string(6) "theoyu"
        ["attributes":protected]=>
        array(3) {
          ["startLine"]=>
          int(2)
          ["endLine"]=>
          int(2)
          ["kind"]=>
          int(2)
        }
      }
      ["attributes":protected]=>
      array(2) {
        ["startLine"]=>
        int(2)
        ["endLine"]=>
        int(2)
      }
    }
    ["attributes":protected]=>
    array(2) {
      ["startLine"]=>
      int(2)
      ["endLine"]=>
      int(2)
    }
  }
  [1]=>
  object(PhpParser\Node\Stmt\Echo_)#1180 (2) {
    ["exprs"]=>
    array(1) {
      [0]=>
      object(PhpParser\Node\Expr\Variable)#1179 (2) {
        ["name"]=>
        string(1) "a"
        ["attributes":protected]=>
        array(2) {
          ["startLine"]=>
          int(3)
          ["endLine"]=>
          int(3)
        }
      }
    }
    ["attributes":protected]=>
    array(2) {
      ["startLine"]=>
      int(3)
      ["endLine"]=>
      int(3)
    }
  }
}
可以使用NodeDumper更加直观的查看AST
use PhpParser\NodeDumper;
$dumper = new NodeDumper;
echo $dumper->dump($ast) ;
array(
    0: Stmt_Expression(
        expr: Expr_Assign(
            var: Expr_Variable(
                name: a
            )
            expr: Scalar_String(
                value: theoyu
            )
        )
    )
    1: Stmt_Echo(
        exprs: array(
            0: Expr_Variable(
                name: a
            )
        )
    )
)
回到源码
<?php
$a="theoyu";
echo($a);
?>
如果我们想改为:
<?php
$a="hacker";
print($a);
?>
对于$a而言,我们可以直接访问AST数组来修改其内容。
var_dump($ast[0]->expr->expr->value);//string(6) "theoyu"
$ast[0]->expr->expr->value="hacker";
var_dump($ast[0]->expr->expr->value);//string(6) "hacker"
不过要想修改函数echo可就没这么简单了,php-parser提供了一个用于访问和遍历AST结点的接口PhpParser\NodeTraverser,同时我们可以自定义继承NodeVisitorAbstract 的visitor,在里面实现需要对AST的操作,即可在遍历结点时达到对AST修改的目的。
class NameNodeVisitor extends NodeVisitorAbstract{
    public function leaveNode(Node $node)
    {
        if ($node instanceof Node\Scalar\String_){
            $node->value="hacker";
        }
    }
}
不过对于echo的修改就没那么容易
class PrintNodeVisitor extends  NodeVisitorAbstract{
    public function leaveNode(Node $node)
    {
       if ($node instanceof Node\Stmt\Echo_){
			//return ...
       }
    }
}
这里我们需要直接返回一个print($a) 的结点,也就是
var_dump($node->exprs[0]->name); //"name"
return new PhpParser\Node\Stmt\Expression(new Node\Expr\Print_(new PhpParser\Node\Expr\Variable($node->exprs[0]->name)));
PrettyPrinter\Standard可以帮助我们从AST复原到源代码
<?php

use PhpParser\Error;
use PhpParser\ParserFactory;
use PhpParser\NodeDumper;
use PhpParser\NodeTraverser;
use PhpParser\Node;
use PhpParser\NodeVisitorAbstract;
use PhpParser\PrettyPrinter;


require "vendor/autoload.php";
$code = <<<'CODE'
<?php
$name="theoyu";
echo($name);
CODE;

class NameNodeVisitor extends NodeVisitorAbstract{
    public function leaveNode(Node $node)
    {
        if ($node instanceof Node\Scalar\String_){
            $node->value="hacker";
        }
    }
}

class PrintNodeVisitor extends  NodeVisitorAbstract{
    public function leaveNode(Node $node)
    {
       if ($node instanceof Node\Stmt\Echo_){
//           var_dump($node->exprs[0]->name); //"name"
            return new PhpParser\Node\Stmt\Expression(new Node\Expr\Print_(new PhpParser\Node\Expr\Variable($node->exprs[0]->name)));
       }
    }
}
$parser=(new ParserFactory())->create(ParserFactory::PREFER_PHP7);
try {
    $ast= $parser->parse($code);
    $traverser = new NodeTraverser();
    $traverser->addVisitor(new NameNodeVisitor());
    $traverser->addVisitor(new PrintNodeVisitor());
    $out=$traverser->traverse($ast);

    $prettyPrinter= new PrettyPrinter\Standard();
    $new_code=$prettyPrinter->prettyPrintFile($out);
    echo $code."\n\n";
    echo "---After Parser--- \n\n";
    echo $new_code;

}catch (Error $e){
    echo 'Parse Error: ', $e->getMessage();
}
输出
<?php
$name="theoyu";
echo($name);
?>

---After Parser---

<?php

$name = "hacker";
print $name;
很好奇为什么中间多了一行空行。。
简单认识了php-parser后,让我们重新回到popmaster的16w行代码。
先看下面这一个类:
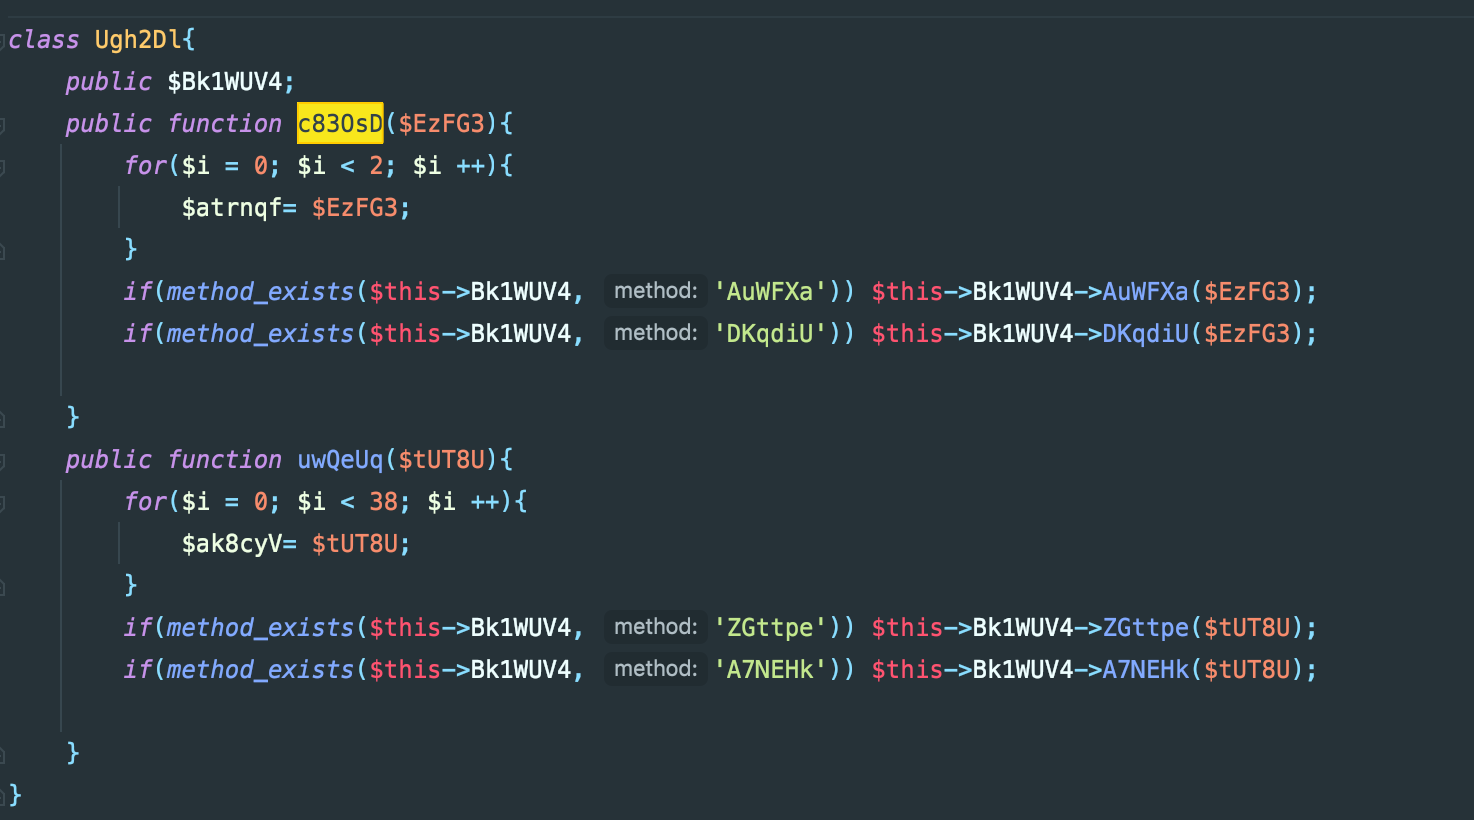
c830sD是我们的入口函数,往下两个if语句构成了两个分支,实际上本题也就是需要我们从一个一个分支后找到正确的一条路径。
因为参数可控,把输入的参数定为污点,每次跳转到新的一层则可看作污点传播,如果在最后eval语句里污点仍存在,即可输出路径。那现在我们也就需要关注到特殊的程序点(Sink),是否有对污点的消毒处理是否有效。
在上面的例子里,第一项虽然对eval语句里的参数进行了字符串拼接,但我们只要在命令执行的后面加上//即可无视拼接语句,故消毒无效。
<?php
$a="echo 3;//echo 4;";
eval($a);
3
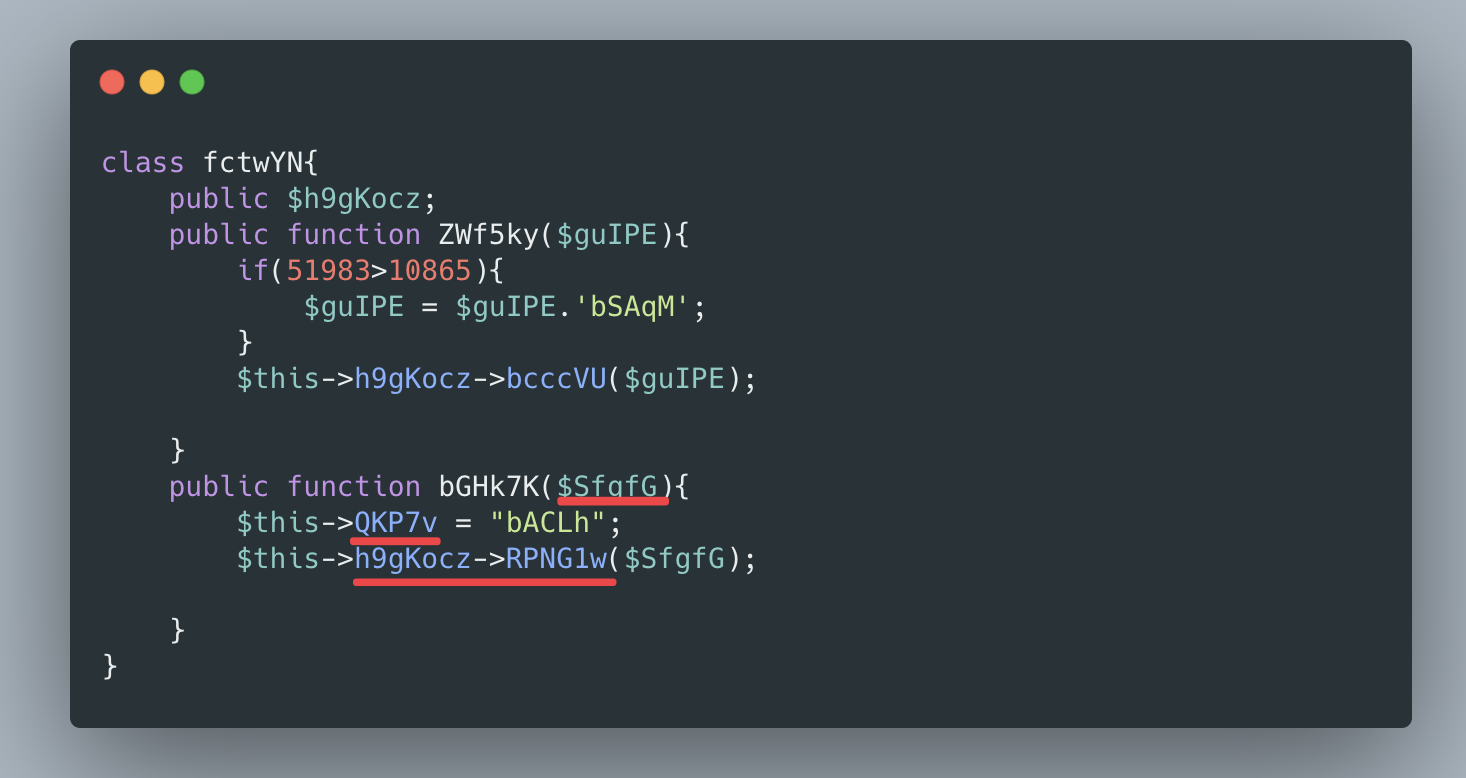
再看下面的消毒,虽然尝试替换变量,并没有替换关键变量,可以看作无效消毒。
这样来看,只有直接把关键变量替换这一种有效消毒方式。
后面结合@Heihu577代码谈谈具体污点分析的实现。
作者首先在污点分析前,创建了一个DelCallVisitor对整个AST进行了一次遍历,如下所示
class DelCallVisitor extends NodeVisitorAbstract {
    public function leaveNode(Node $node)
    {
        if($node instanceof Node\Stmt\If_ &&
        $node -> cond instanceof FuncCall &&
        $node -> cond -> name -> parts[0] == 'method_exists'
        ){
            if($node -> stmts){
                return $node -> stmts[0];
            }
        }
    }
}
比如原语句为
if(method_exists($this->rHzhIHw, 'kzPUMm')) $this->rHzhIHw->kzPUMm($NEaSt);
AST为
stmts: array(
    0: Stmt_If(
        cond: Expr_FuncCall(
            name: Name(
                parts: array(
                    0: method_exists
                )
            )
            args: array(
                0: Arg(
                    name: null
                    value: Expr_PropertyFetch(
                        var: Expr_Variable(
                            name: this
                        )
                        name: Identifier(
                            name: rHzhIHw
                        )
                    )
                    byRef: false
                    unpack: false
                )
                1: Arg(
                    name: null
                    value: Scalar_String(
                        value: kzPUMm
                    )
                    byRef: false
                    unpack: false
                )
            )
        )
        stmts: array(
            0: Stmt_Expression(
                expr: Expr_MethodCall(
                    var: Expr_PropertyFetch(
                        var: Expr_Variable(
                            name: this
                        )
                        name: Identifier(
                            name: rHzhIHw
                        )
                    )
                    name: Identifier(
                        name: kzPUMm
                    )
                    args: array(
                        0: Arg(
                            name: null
                            value: Expr_Variable(
                                name: NEaSt
                            )
                            byRef: false
                            unpack: false
                        )
                    )
                )
            )
        )
        elseifs: array(
        )
        else: null
    )
经过一轮traverse后,AST变为了
stmts: array(
    0: Stmt_Expression(
        expr: Expr_MethodCall(
            var: Expr_PropertyFetch(
                var: Expr_Variable(
                    name: this
                )
                name: Identifier(
                    name: rHzhIHw
                )
            )
            name: Identifier(
                name: kzPUMm
            )
            args: array(
                0: Arg(
                    name: null
                    value: Expr_Variable(
                        name: NEaSt
                    )
                    byRef: false
                    unpack: false
                )
            )
        )
    )
通过复原也就是
$this->rHzhIHw->kzPUMm($NEaSt);
刚开始很好奇为什么要加上这一个visitor,后来发现如果把这里的if分支全部优化,那么每个函数的开始开始可以分为4类:
- for 循环,然后赋值语句
- if(a>b)或者if(a<b),然后赋值语句
- 直接赋值
- 直接调用下一个跳转
这也分别代表ParseItem函数中的4个分支,之后也就是也就是针对以上四种方式(准确说只有前三种,因为跳转到下一个函数,就已经开始新的ParseItem)的赋值语句,判断消毒是否有效。
后续用getCallName拿到后续跳用的方法,反复调用,知道没有后续的方法,也就是走到了eval
function getCallName($stmts){
    $call = array();
    foreach($stmts -> stmts as $stmt){
        if($stmt instanceof Node\Stmt\Expression &&
        $stmt -> expr instanceof Node\Expr\MethodCall &&
        $stmt -> expr -> var instanceof Node\Expr\PropertyFetch
        ){
            $call[] = $stmt -> expr -> name -> name;
        }
    }
    return $call;
}
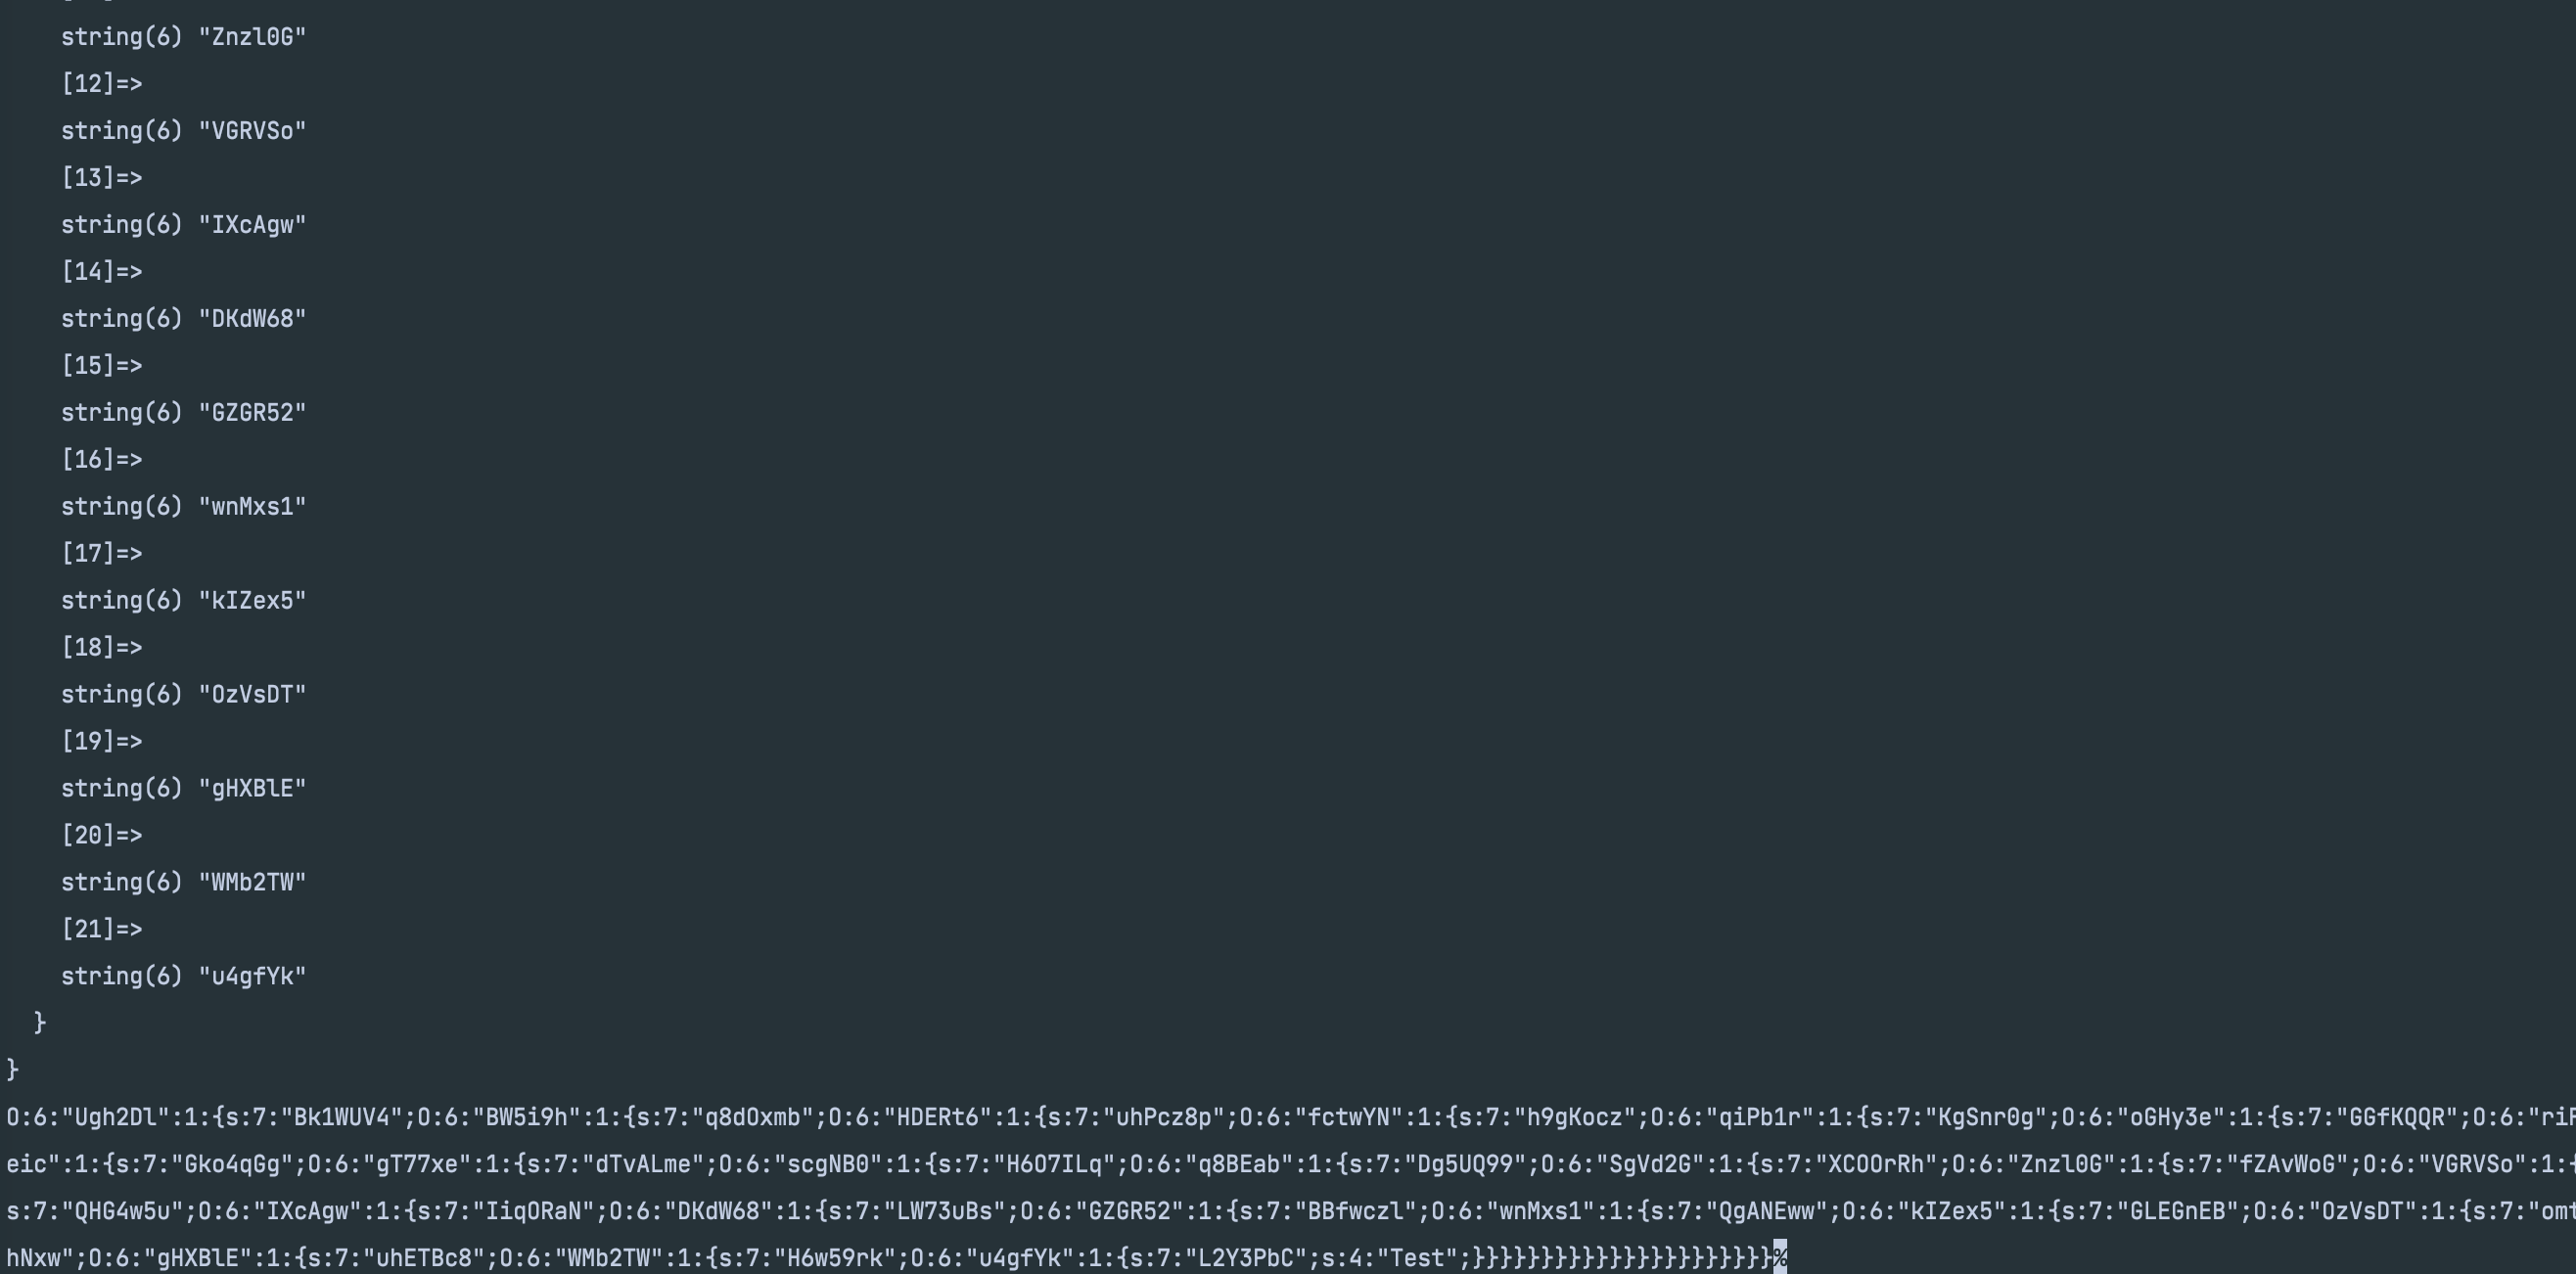
其实走到这,我们就拿到了pop链的路线,不过作者还写了一个ParseClassVisitor,可以通过最后一次遍历pop数组即可拿到序列化后的字符串。
本来我以为这就结束了,直到我们看到了方法5,实在不得不惊叹师傅对问题的钻研精神。
简单来说,以下的情况:
class A extends Father{
    public function FuncA(){
        $this->a->FuncB();
    }
}
class B extends Father{
    public function FuncB(){
        $this->b->FuncC();
    }
}
class C extends Father{
    public function FuncC(){
        eval(System('whoami'));
    }
}
$demo =new A;
$demo->FuncA();
我们该怎么写Father类,当调用$demo->FuncA();,可以自动调用到eval里的函数。
class Father{
    public function __get($name)
    {
        return $this ;
    }
    public function __call($funcName, $arguments)
    {
        foreach (get_declared_classes() as $index=>$value){
            if($index>=176){
                try {
                    $obj = new $value;
                    if (method_exists($obj, $funcName)) {
                        $obj->$funcName();
                    }
                }catch (Exception $e){}
            }
        }
    }
}
这样看,当调用$this->a->FuncB();,因为当前没有a属性,调用__get相当变成了$this->FuncB(),然后在__call中遍历所有类,找到有这个方法的类并以此反复调用下去。而如果要记录这样的一条pop链,只需要在__get()和__call()方法中做一些简单手脚即可。
不过虽然这样的方法看似自动帮我们生成了pop链,但是还是有一些弊端。因为作者实现已经用python正则完善了对数据流的优化,把很多变量名以及方法进行了替换。但在实际环境中想要自动化生成pop链我感觉还是很困难,毕竟数据流的动向实在是太复杂了。
总的来说还是感谢师傅分享了这样一篇文章,收获良多,也希望自己今后多总结思考,毕竟ctf的乐趣不也在于此吗?